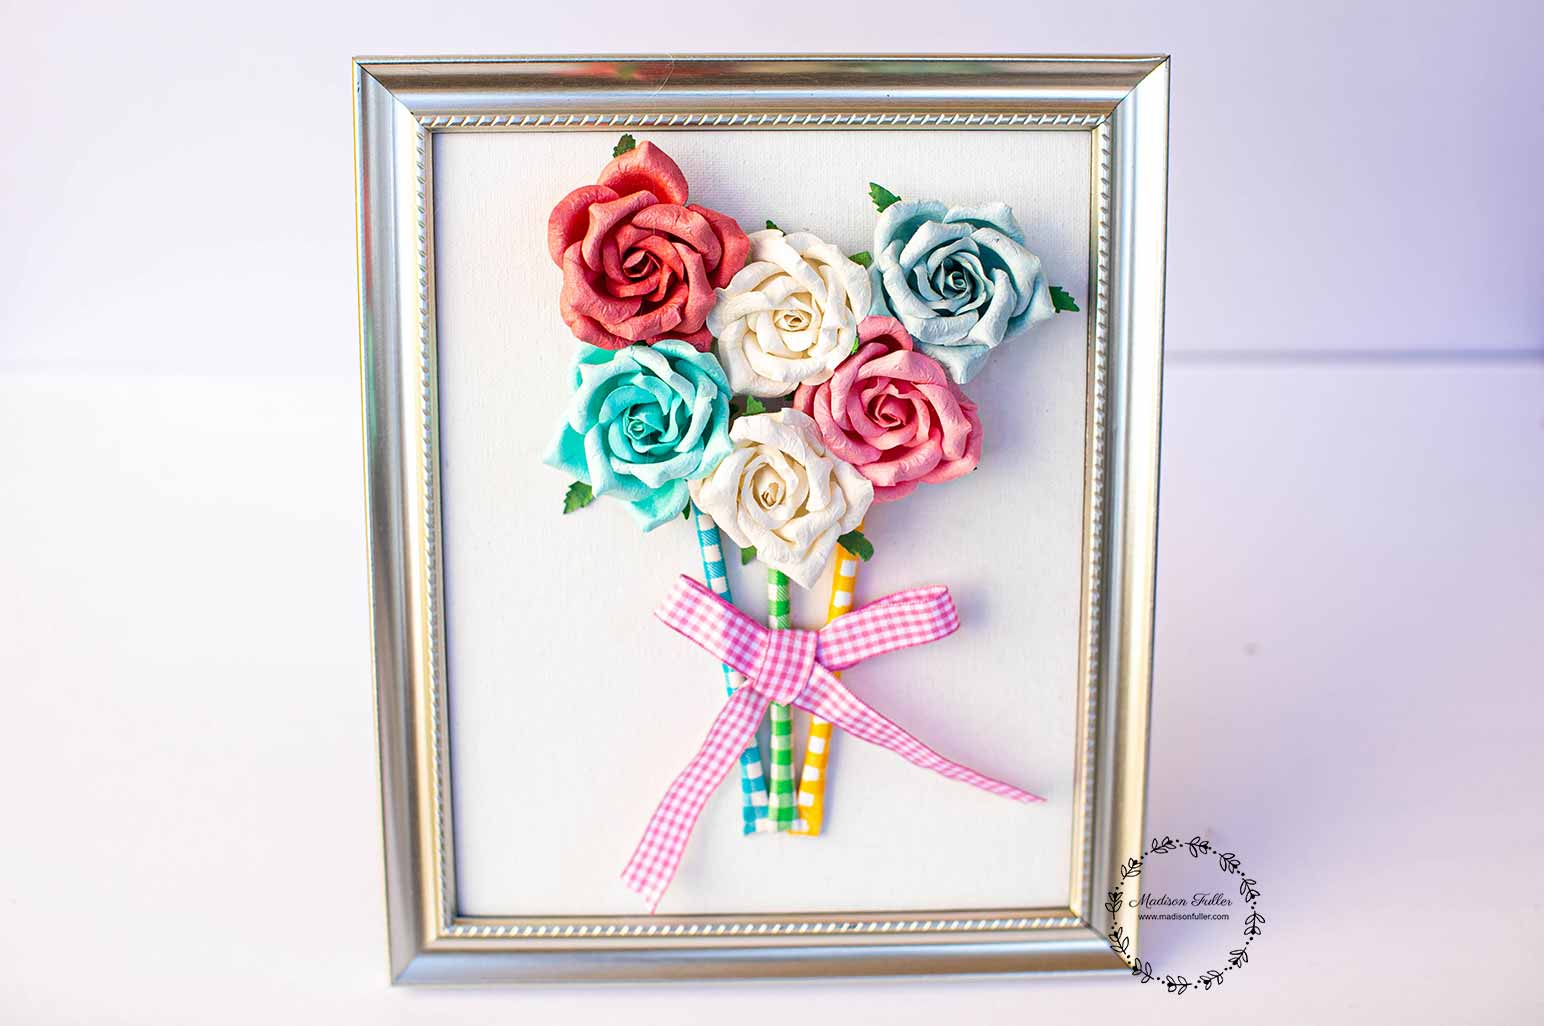
I'm back again with another craft that you can get the kids involved in doing. This framed floral bouquet is easy to recreate and makes for great decor or gift-giving.
My mom is actually the crafty one, but I also enjoy making items that I get to keep. While some such as my Borax-Free Glitter Slime and even my Lorax Truffula Trees only stick around for a short time, others such as my Valentine's Day Candy Shadow Box, my 4th of July Mason Jar and now this Frame Bouquet will last forever.
All of my crafts that you'll find here on my site are really simple to do, and many kids won't need help making them, but it's always nice to have the adults involved as well. It allows you to spend some one-on-one quality time with your parents. That's just one of the reasons I enjoy crafting with my own mom.
So let's get into how this Framed Bouquet is done and what you'll need:
8x10 Photo Frame (We picked ours up at the dollar store)
8x10 Unstretched Canvas (Also purchased at the dollar store)
Colorful paper straws (you can also paint white ones)
Paper or faux flowers
Glue gun and glue
Ribbon
Scissors

STEP 1 - Begin by gathering all your supplies together. Remove the glass from your photo frame and replace the display photo with your unstretched canvas. Set the glass aside somewhere carefully to be placed in the trash. You will not need the glass. Grab your straws and cut them about 4-5" in length.

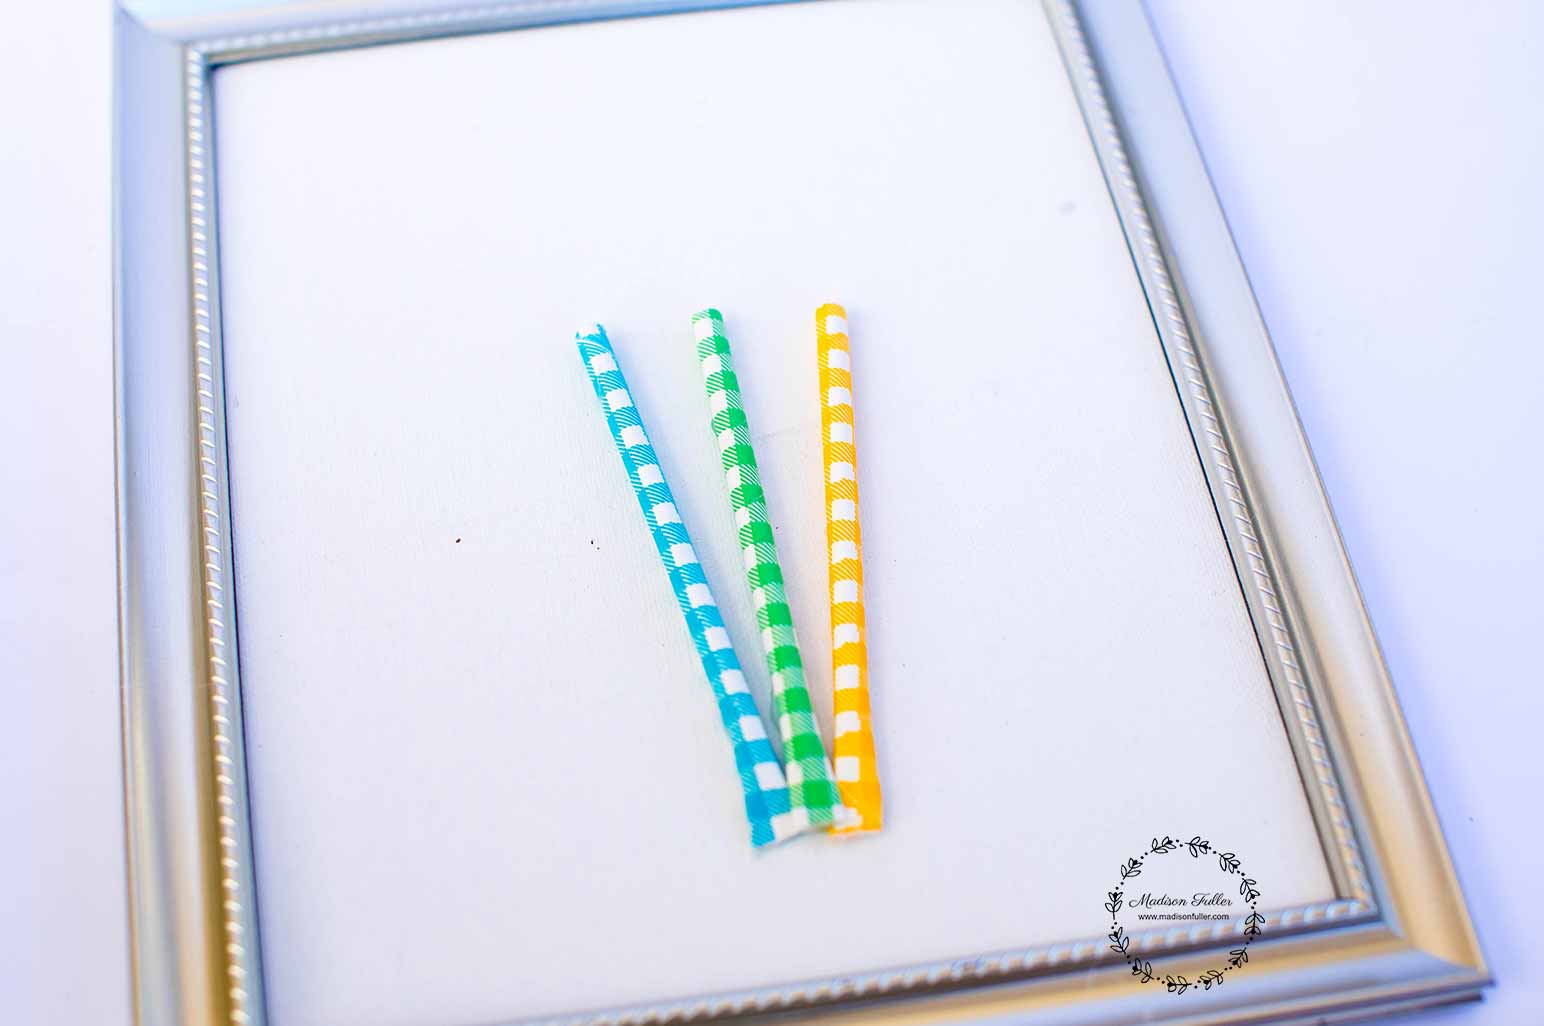
STEP 2 - Once cut, squeeze flat one end of the straw and glue them together. This is where you're going to need the help of an adult because the glue will be hot. You're only going to need a little bit of glue, but be sure that it's on the inside of each straw, as in the photo below.

STEP 3 - Glue your straws in a V formation on your canvas that's inside your frame. Simply run a thin line on the back of each straw and attach it to your canvas. Once again, you may need the help of an adult if you're using a glue gun. If using a glue gun, it'll take little to no time to dry and adhere to your canvas.
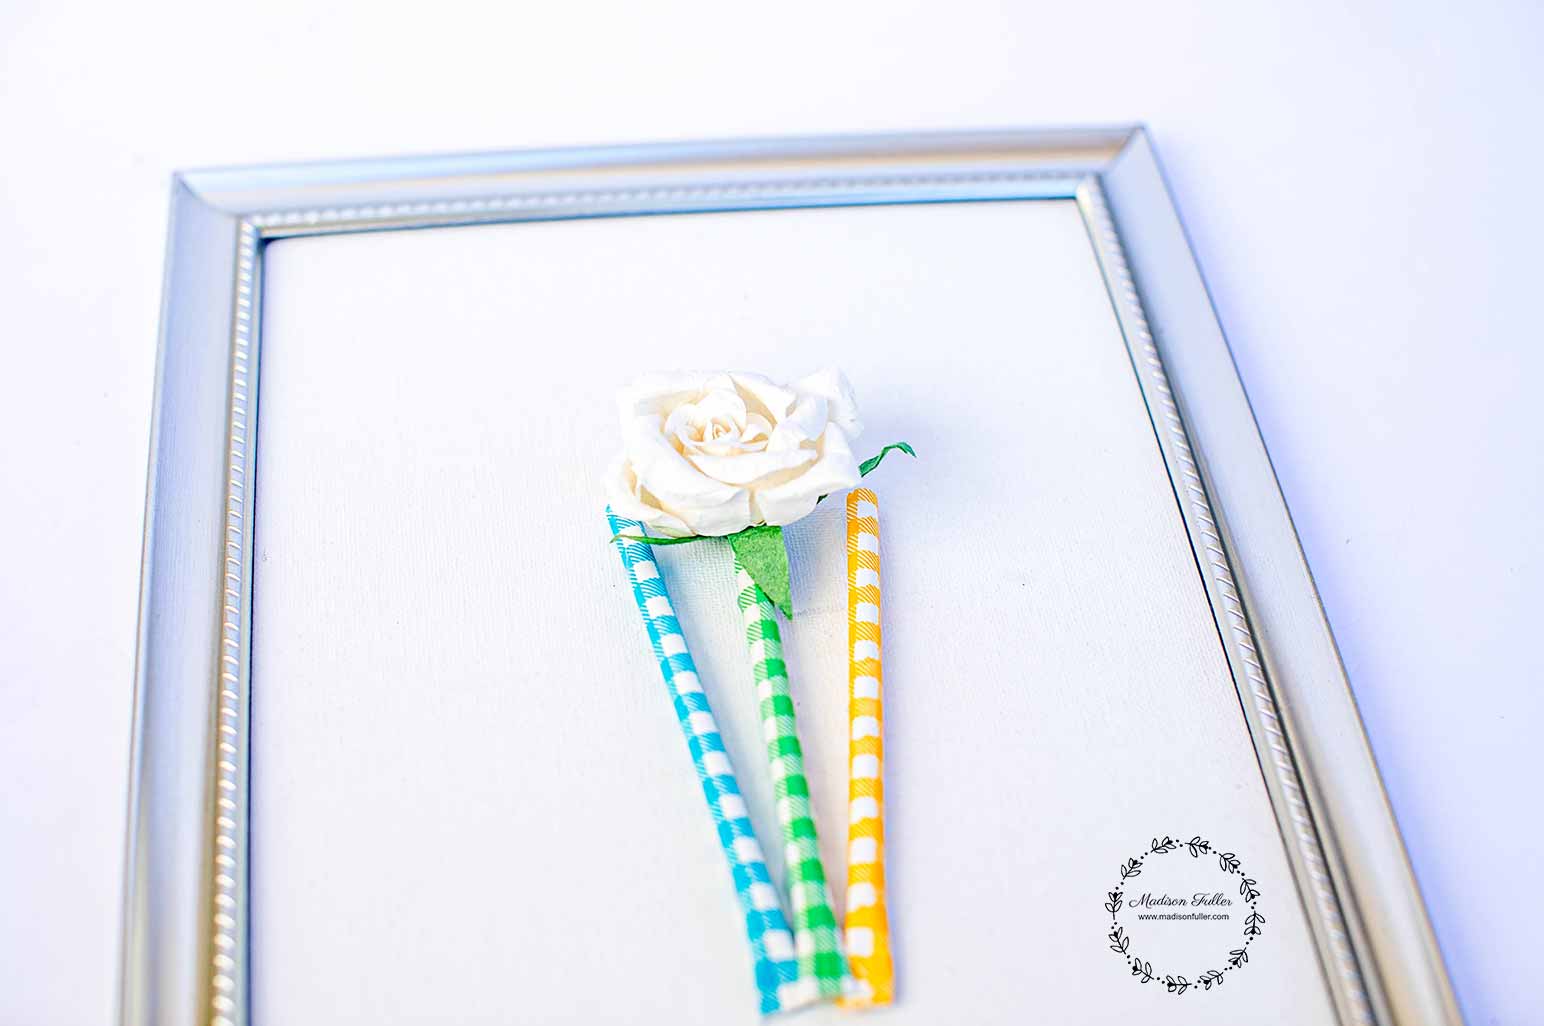
STEP 4 - Once the glue has dried on your canvas, it's now time to attach your flowers. We used paper flowers that we found at the dollar spot of Michaels. Start by adding a bit of glue to the back of a flower and attach it to the middle stem (straw) as that would give you a general idea of where the others will go.
STEP 5 - Simply add some glue to the others and complete the rest of your bouquet.

Step 6: Make a little bow with your ribbon and attach it to your bouquet stems. It really adds a nice touch. Now, attach the backing of your frame to finish the job.
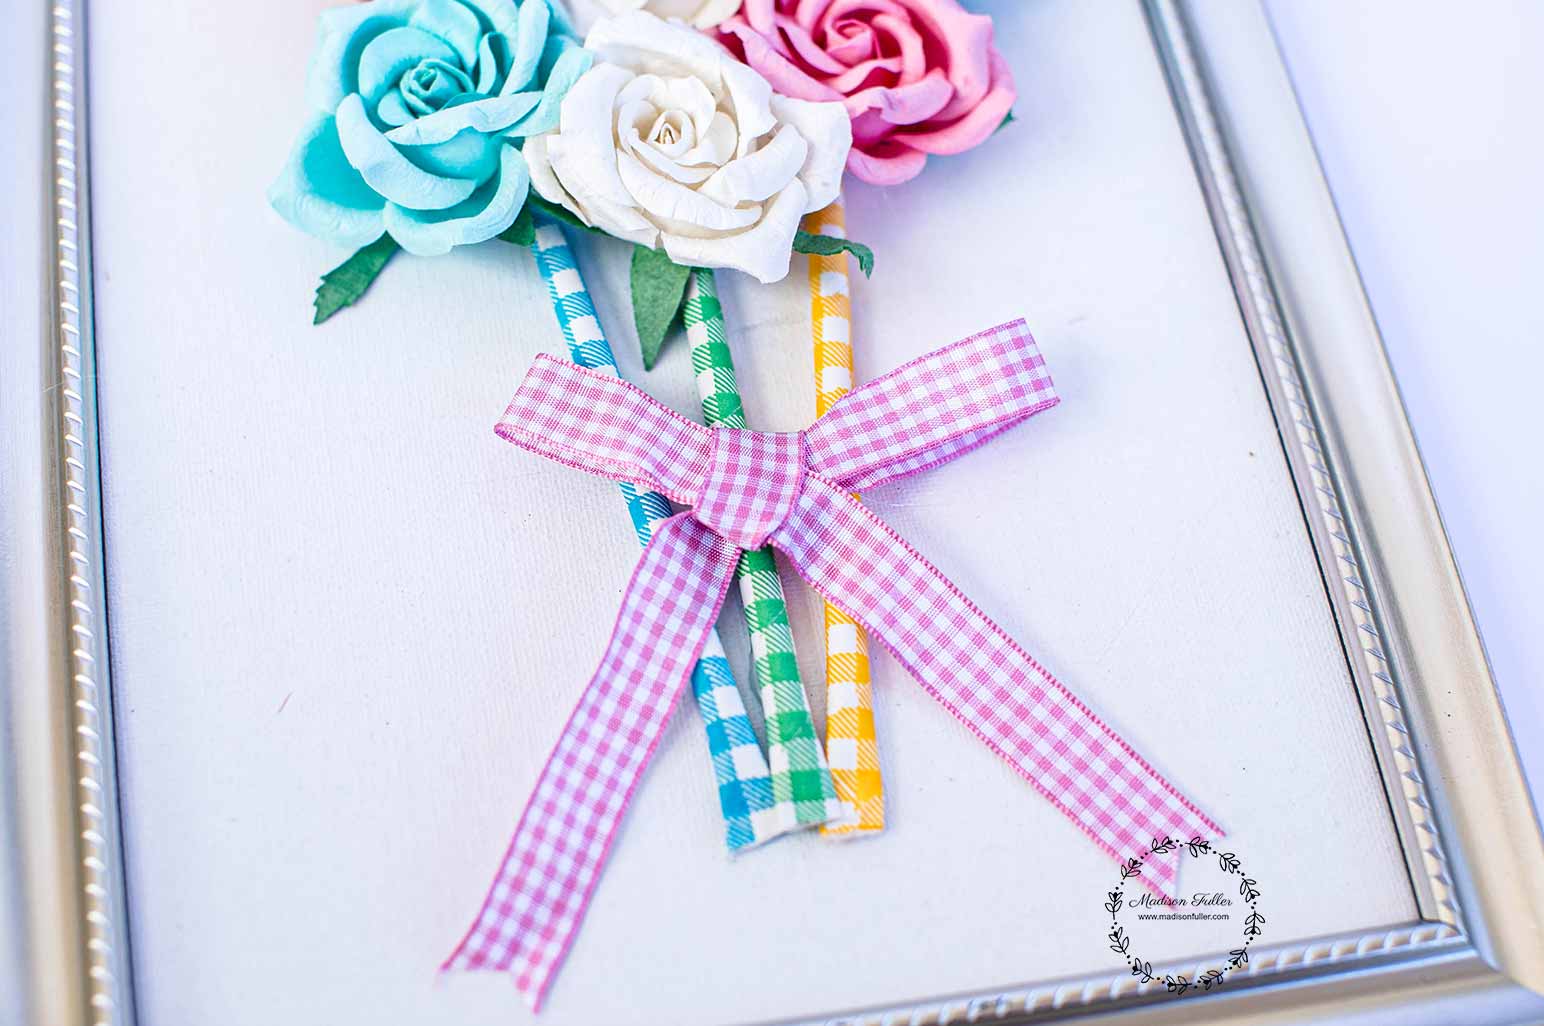
That's it! Your bouquet is complete and ready to hang or place wherever you desire. Can you believe how easy it was? The kids will enjoy making it, and so will you.
This would make a great gift to give to grandmas and moms. And since it's handmade, it'll hold more value than an actual bouquet of flowers that will die, as this never will.


My mom is actually the crafty one, but I also enjoy making items that I get to keep. While some such as my Borax-Free Glitter Slime and even my Lorax Truffula Trees only stick around for a short time, others such as my Valentine's Day Candy Shadow Box, my 4th of July Mason Jar and now this Frame Bouquet will last forever.
All of my crafts that you'll find here on my site are really simple to do, and many kids won't need help making them, but it's always nice to have the adults involved as well. It allows you to spend some one-on-one quality time with your parents. That's just one of the reasons I enjoy crafting with my own mom.
So let's get into how this Framed Bouquet is done and what you'll need:

SUPPLIES
8x10 Photo Frame (We picked ours up at the dollar store)
8x10 Unstretched Canvas (Also purchased at the dollar store)
Colorful paper straws (you can also paint white ones)
Paper or faux flowers
Glue gun and glue
Ribbon
Scissors

DIRECTIONS
STEP 1 - Begin by gathering all your supplies together. Remove the glass from your photo frame and replace the display photo with your unstretched canvas. Set the glass aside somewhere carefully to be placed in the trash. You will not need the glass. Grab your straws and cut them about 4-5" in length.

STEP 2 - Once cut, squeeze flat one end of the straw and glue them together. This is where you're going to need the help of an adult because the glue will be hot. You're only going to need a little bit of glue, but be sure that it's on the inside of each straw, as in the photo below.

STEP 3 - Glue your straws in a V formation on your canvas that's inside your frame. Simply run a thin line on the back of each straw and attach it to your canvas. Once again, you may need the help of an adult if you're using a glue gun. If using a glue gun, it'll take little to no time to dry and adhere to your canvas.

STEP 4 - Once the glue has dried on your canvas, it's now time to attach your flowers. We used paper flowers that we found at the dollar spot of Michaels. Start by adding a bit of glue to the back of a flower and attach it to the middle stem (straw) as that would give you a general idea of where the others will go.

STEP 5 - Simply add some glue to the others and complete the rest of your bouquet.

Step 6: Make a little bow with your ribbon and attach it to your bouquet stems. It really adds a nice touch. Now, attach the backing of your frame to finish the job.

That's it! Your bouquet is complete and ready to hang or place wherever you desire. Can you believe how easy it was? The kids will enjoy making it, and so will you.
This would make a great gift to give to grandmas and moms. And since it's handmade, it'll hold more value than an actual bouquet of flowers that will die, as this never will.
PIN THIS POST TO YOUR FAVORITE PINTEREST BOARD.


